Overview
This web application streamlines the scheduling and management of employee shifts. It allows managers to create, assign, and track work schedules across departments, ensuring optimal resource allocation and compliance with labour regulations.
Navigation Path
System Management → System Administration → Shift Roster
Function
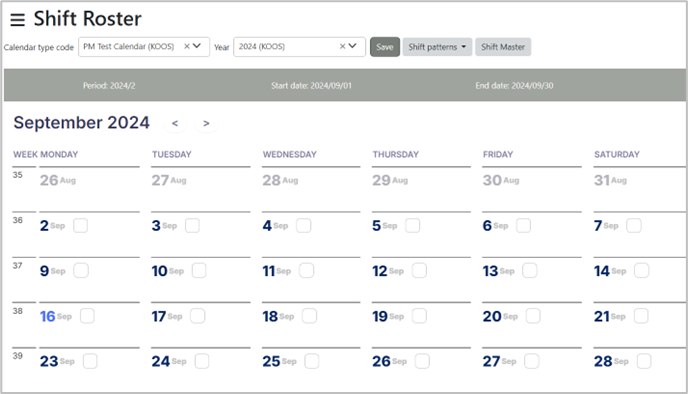
Once opened you will view the following Shift Roster screen:

You can select the 'Calendar type code' as well as the 'year' from the drop-down options available:

The screen will then look as follows when the calendar type code and year is selected.
You can the click on relevant days that you want to change by ticking the box next to the specific date, which will look as follows:
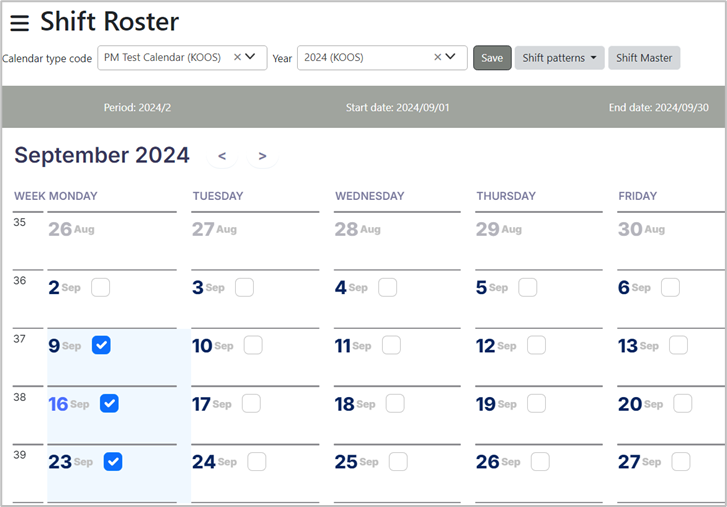
After you selected the dates on the calendar that you want to change you can click on the 'Save' button.
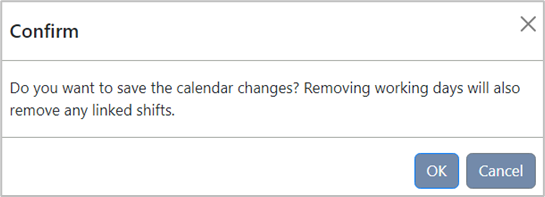
The following message will be given where you must then select 'OK':
Selecting the ![]() button, you will be able to select either to ‘Add/Edit’ or to ‘Delete’.
button, you will be able to select either to ‘Add/Edit’ or to ‘Delete’.
By selecting the ‘Add/Edit’ option the following pop-up screen will be given:
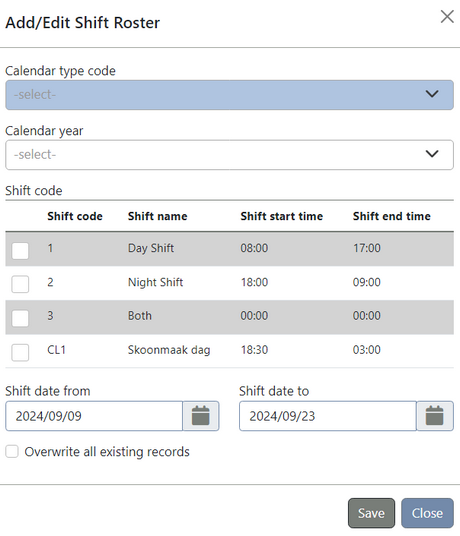
You can select all the relevant options according to your requirements and click on the ‘Save’ button to save the changes.
When you select the ‘Delete’ option under shift patterns, the following pop-up screen will be given:
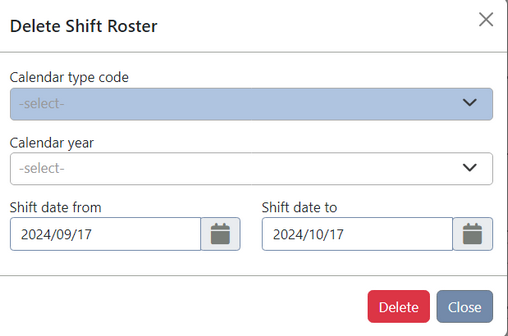
You can select the relevant options according to your requirements and then click on the ‘Delete’ button
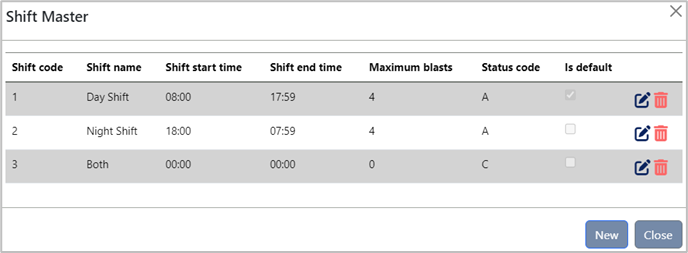
Selecting the 'Shift Master' button opens a pop-up screen displaying a list of shifts:
Each entry includes the shift code, start and end times, maximum blasts, status codes, and an indicator showing whether it is the default shift.
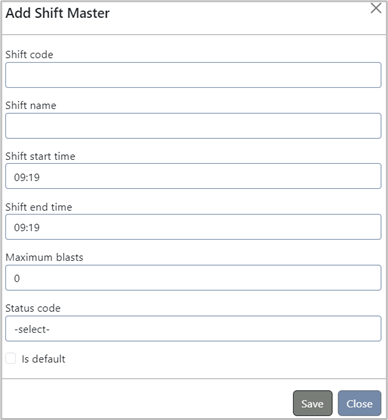
Selecting the 'New' button opens a screen that allows you to add a new shift to the shift master.
Manually enter the Shift Code and Shift Name. Select the Shift Start Time and Shift End Time from a dropdown menu, available in 15-minute intervals. Adjust the Maximum Blasts using the up and down buttons to set the desired number. Choose the Status Code from the dropdown menu, selecting between Active, Closed, or Suspended. If this shift is to be the default, tick the Is Default box at the bottom.
Select the 'Save' button, and a pop-up message will be displayed, confirming that the record has been inserted successfully.

You will be returned to the Shift Master list, where your newly added shift will be displayed.
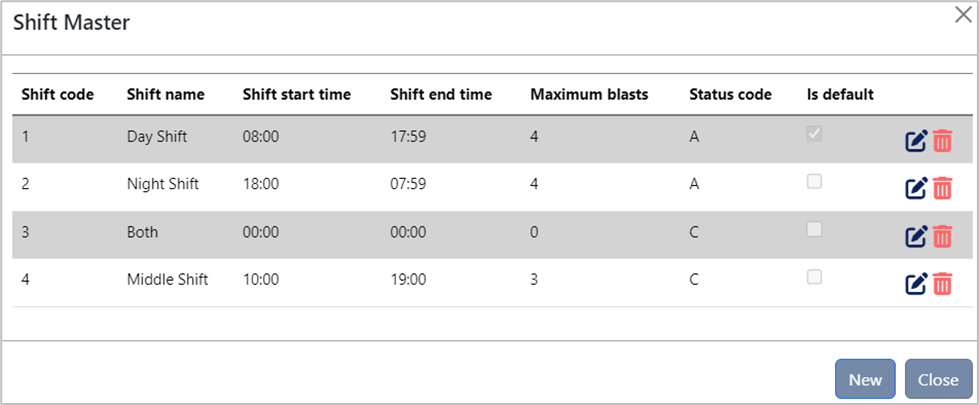
Here, you can delete ![]() or edit
or edit ![]() shifts by selecting the corresponding icon. Selecting the edit icon opens a screen displaying the shift's information, which you can manually edit.
shifts by selecting the corresponding icon. Selecting the edit icon opens a screen displaying the shift's information, which you can manually edit.
Select the 'Close' button to return to the Shift Roster screen.