Overview
Responsibility Number Maintenance allows you to set up and maintain the responsibility tree or organizational structure within the company.
Account ranges per responsibility are also set up and maintained using this application.
Typical Users
All (to setup own Acting); Admin, management (add/amend any Resp)
Risk Factors
Care should be taken when changing master file data.
Function
When opened, the following screen will be displayed:

If the USE_MANUFACT parameter is switched on, you will be able to select whether or not the responsibility will be allowed to do manufacturing approvals. Without this parameter this option will not be displayed:

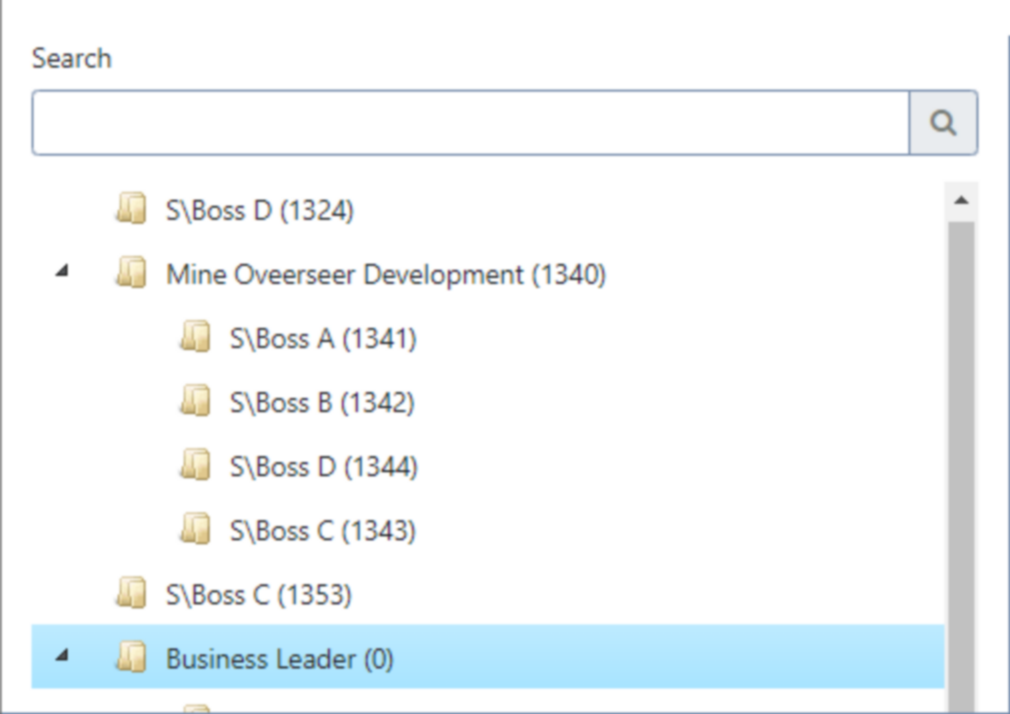
The tree view on the left can be expanded in order to view the responsibilities in their hierarchy. You can also use the search function to search for a specific responsibility.
When you click on an item in the tree view the detail will be populated:
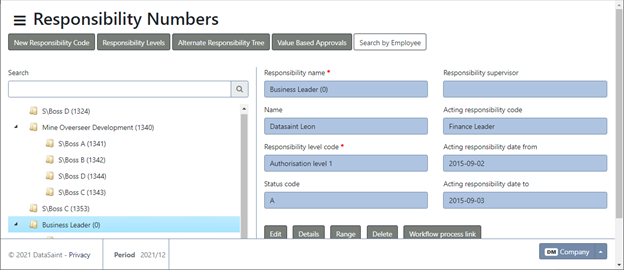
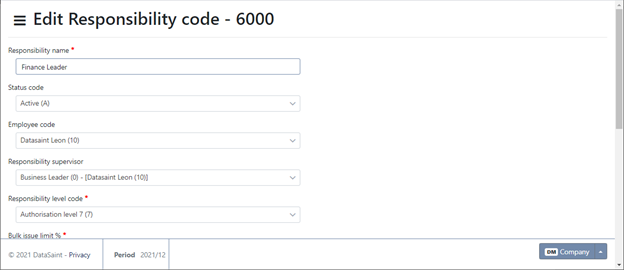
Select ![]() to edit details for an existing Responsibility Number. Users with level 0 and 1 can amend the Acting Resp Number field and dates from and to.
to edit details for an existing Responsibility Number. Users with level 0 and 1 can amend the Acting Resp Number field and dates from and to.
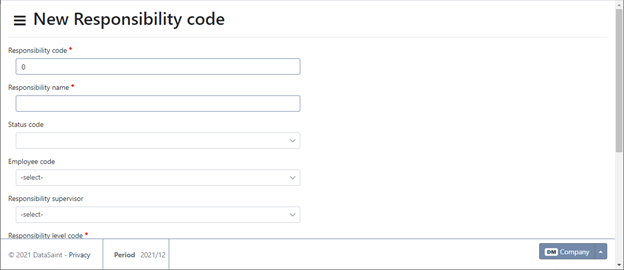
Select ![]() to add a new Responsibility.
to add a new Responsibility.

Note: EXCO member option - If a responsibility is marked as EXCO member, the user is assigned the highest category which is further used in the Travel Claims Workflow Approvals, i.e. higher category has more privileges than non EXCO members.
External Responsibility - This refers to a non-employee, for example a contractor.
Summarise Email - The system will send a summary email notification regarding transactions to authorize/process. Instead of detailed it will only list number of transactions and lines.
The ![]() button allows you to view the responsibilities in a grid format:
button allows you to view the responsibilities in a grid format:
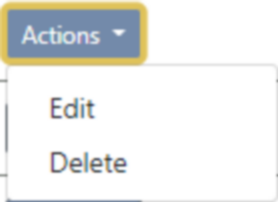
The grid has the standard ![]() button with the following options:
button with the following options:

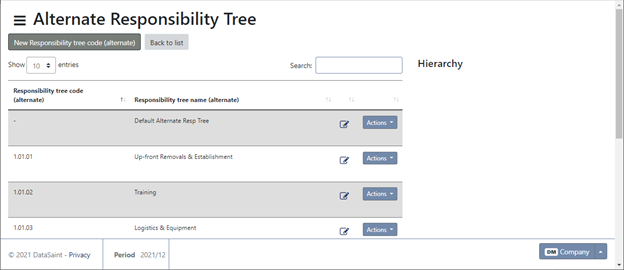
The ![]() option allows you to edit the alternate responsibility tree:
option allows you to edit the alternate responsibility tree:
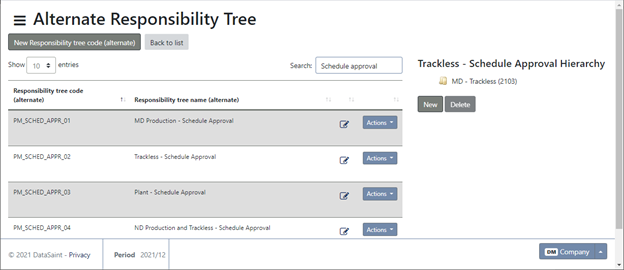
When you click on the ![]() button and select the details option, the hierarchy for the selected line will be displayed:
button and select the details option, the hierarchy for the selected line will be displayed:
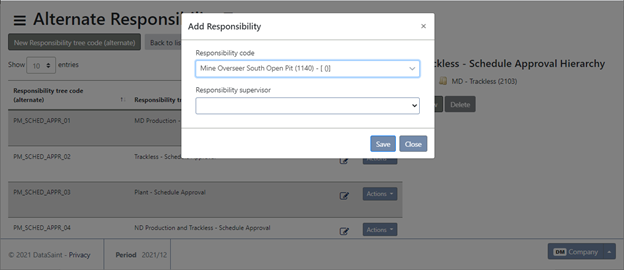
Select the ![]() button to add responsibilities to the hierarchy:
button to add responsibilities to the hierarchy:
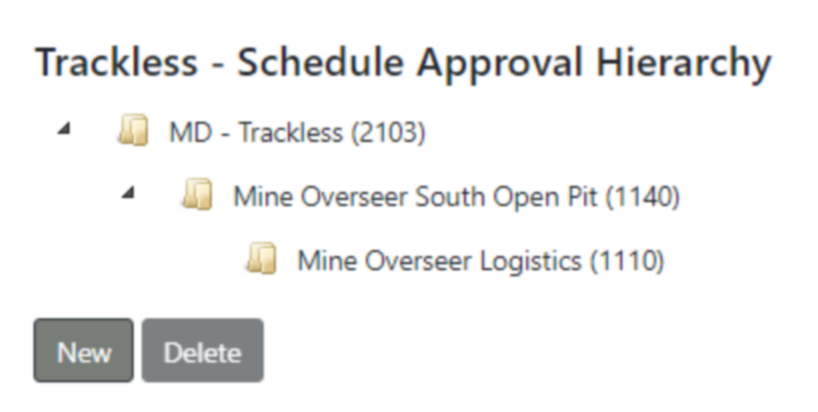
Multiple responsibilities can be added here:
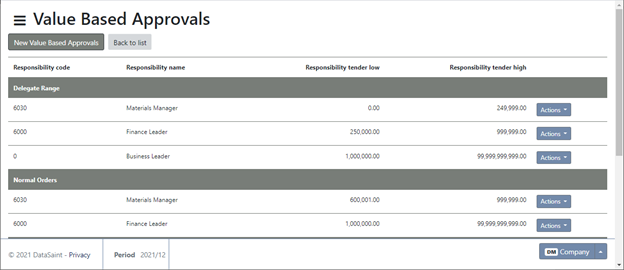
The ![]() allows you to set up value based approvals in a grid format:
allows you to set up value based approvals in a grid format:
The standard ![]() button is available in the grid with the following options:
button is available in the grid with the following options:
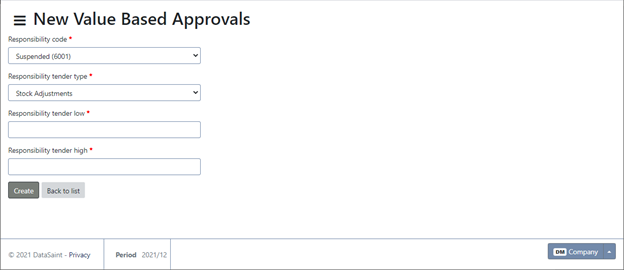
The ![]() button allows you to create new value-based approvals:
button allows you to create new value-based approvals:
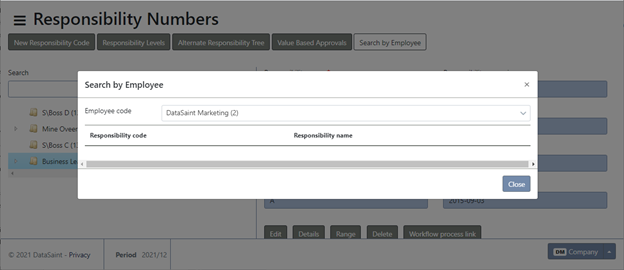
The ![]() button allows you to search for a specific employee:
button allows you to search for a specific employee:
The ![]() button allows you to edit the details of the selected responsibility:
button allows you to edit the details of the selected responsibility:
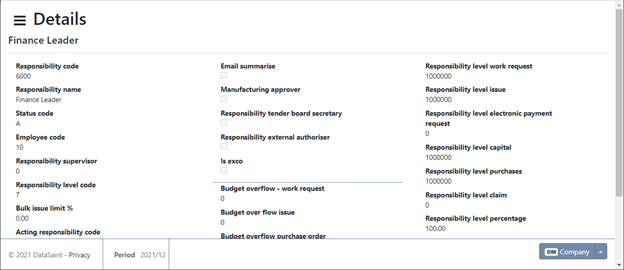
The ![]() button will display all the details of the selected responsibility:
button will display all the details of the selected responsibility:
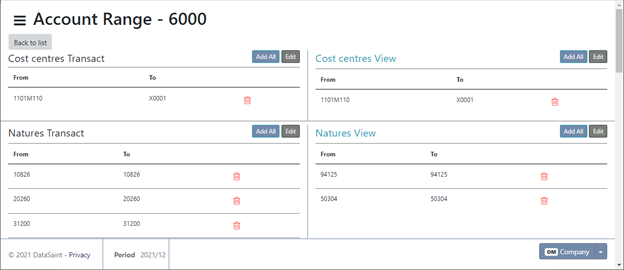
The ![]() button will display the account ranges for the selected responsibility. From here, ranges can be added, edited and removed:
button will display the account ranges for the selected responsibility. From here, ranges can be added, edited and removed:
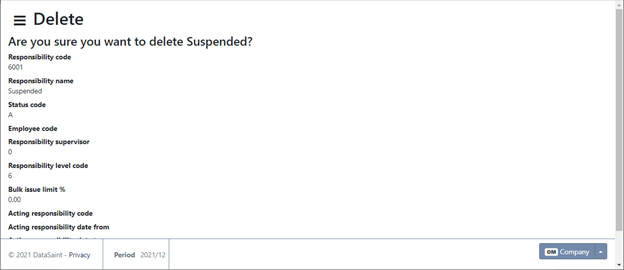
The ![]() button allows you to delete the selected responsibility.
button allows you to delete the selected responsibility.
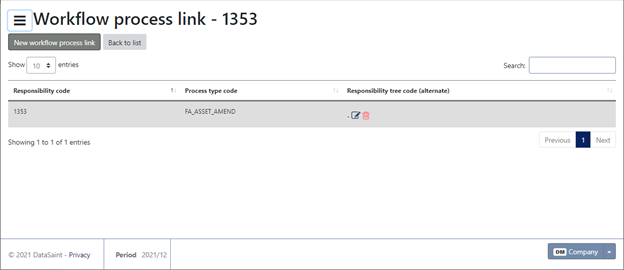
The ![]() button will display the following, allowing you to create Workflow links.
button will display the following, allowing you to create Workflow links.
Click on ![]() to create a new link:
to create a new link:
